

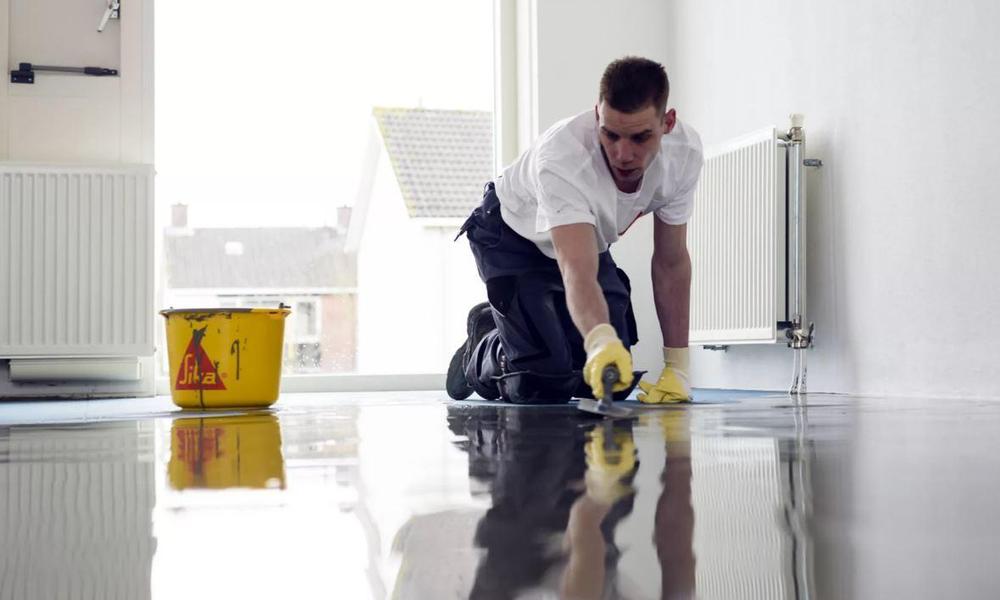
Installing a floor self-levelingis a great way to ensure a smooth and level surface for a new floor. Here are some tips for preparing for the installation of floor self-leveling:
- Clean the floor: The first step is to clean the existing floor thoroughly. Remove any dirt, debris, or loose materials from the surface. Any bumps or high spots should be sanded down, and any low spots should be filled with a leveling compound.
- Plan the installation: Plan the installation by measuring the square footage of the room and calculating how much self-leveling compound will be needed. Check the manufacturer’s instructions for the recommended thickness of the self-leveling compound.
- Gather supplies: Purchase all necessary supplies, including the self-leveling compound, mixing bucket, drill with a mixing attachment, water, and a trowel.
- Mix the self-leveling compound: Follow the manufacturer’s instructions for mixing the self-leveling compound. Use a drill with a mixing attachment to mix the compound until it is smooth and free of lumps.
How to Maintain and Care for Your Floor Self-Leveling
Regular cleaning: Regular cleaning is essential to keep your self-leveling floor in good condition. Sweep or vacuum the floor regularly to remove any loose dirt and debris. Use a damp mop to clean the floor but avoid using harsh chemicals that can damage the surface.
Protect from scratches: Self-leveling floors can be susceptible to scratches and dents, especially if heavy objects are dropped on them. To protect your floor from scratches, use felt pads on the bottom of furniture legs and avoid dragging heavy items across the floor.
Avoid standing water: Although self-leveling floors are water-resistant, standing water can cause damage to the surface over time. Clean up any spills or standing water immediately to prevent damage.
Avoid high-heat exposure: Self-leveling floors can be sensitive to high temperatures. Avoid exposing the floor to direct sunlight or heat sources, such as radiators, and use rugs or mats in high-traffic areas to prevent damage.
Reapply sealer: Self-leveling floors require a sealer to protect the surface from wear and tear. Reapply the sealer every few years to maintain the protective layer and keep your floor looking great.
Advantages of Floor Self-Leveling
- Timesaving: The floor self-leveling process is quick and efficient, allowing for a large area to be covered in a short period of time. This means that you can have a level and smooth floor in a matter of hours, rather than days or weeks.
- Cost-effective: Self-leveling floors can be less expensive than traditional flooring options, such as tile or hardwood, because they require less material and labor. Additionally, self-leveling floors can often be installed over existing flooring, eliminating the need for costly demolition.
- Durability: Self-leveling floors are extremely durable and can withstand heavy foot traffic, making them an ideal choice for commercial and industrial settings. They are also resistant to wear and tear, cracking, and chipping.
- Aesthetics: Self-leveling floors create a smooth and even surface, which can enhance the overall appearance of a space. The floors can be finished with a variety of coatings, such as epoxy or polyurethane, to achieve a desired look.
- Accessibility: Self-leveling floors can be installed to create a level surface for individuals with disabilities, making it easier for them to move around safely.

